Are you tired of outdated or leaky bathtub fixtures? Whether you’re planning a full renovation or just want to give your bathroom a little facelift, removing old fixtures is the first step. This task might seem daunting at first, but with the right approach and tools, you can tackle it like a pro. Not only will this improve your space aesthetically, but it can also help save water and enhance efficiency—especially if paired with an updated water heater. Ready to roll up your sleeves and dive in? Let’s explore how to remove those bathtub fixtures smoothly and efficiently!
The importance of removing bathtub fixtures
Removing bathtub fixtures is essential for several reasons. First, outdated or damaged fixtures can lead to leaks and water wastage. This not only impacts your water bill but also contributes to environmental concerns.
Upgrading these components improves the overall look of your bathroom. New fixtures can transform a dull space into a stylish retreat, enhancing both functionality and aesthetics.
Another crucial factor is maintenance. Old faucets and showerheads may become difficult to repair over time. By removing them, you pave the way for more reliable options that require less upkeep.
Additionally, if you’re considering changing your water heater or plumbing system, it’s important to remove existing fixtures first. This ensures compatibility with new installations while allowing easier access during upgrades.
Taking the time to remove old bathtub fixtures sets the stage for improvements that benefit both comfort and efficiency in your home.
Necessary tools and materials
To successfully remove bathtub fixtures, you’ll need a few essential tools. Start with an adjustable wrench and a screwdriver. These will help tackle most components without causing damage.
A pair of pliers can come in handy for gripping tight spots. Don’t forget to grab some plumber’s tape; it ensures a leak-free installation when you’re ready to add new fixtures.
Having rags or towels nearby is smart, too. They’ll assist in cleaning up any water spills that might occur during the removal process.
If your bathtub has stubborn screws or nuts, consider having penetrating oil on hand. This can loosen rusted parts and make your job easier.
Wear gloves for protection and comfort while working with plumbing elements. Being equipped with these materials will streamline the entire fixture removal process.
Step-by-Step Guide:
Shutting off the water supply is your first step. Locate the shut-off valves, typically found under the sink or near the water heater. Turn them clockwise until they’re completely off.
Next, gather all necessary tools and materials. You’ll need a wrench, screwdrivers, pliers, and possibly some plumber’s tape for sealing later on.
Begin by removing the showerhead and faucet handles. Use a wrench to loosen any nuts before gently pulling them off. Be cautious not to damage any surrounding surfaces.
The escutcheon plates come next. These cover up gaps around pipes; loosen them carefully with a screwdriver or pliers as needed.
Now it’s time to detach the bathtub spout. Depending on its design, you might find set screws or threaded connections that require attention.
After everything is removed, take a moment to clean the area thoroughly in preparation for your new fixtures. Getting this right will help ensure proper installation down the line.
A. Shut off the water supply
Before diving into the task of removing bathtub fixtures, it’s crucial to shut off the water supply. This simple step can save you from unexpected floods and messy situations.
Locate your home’s main water valve. It is often found near where the water line enters your house or in a basement area. Turn this valve clockwise until it stops; this will effectively halt the flow of water throughout your plumbing system.
If you’re only working on one bathroom, look for local shut-off valves that control just that area. They are typically located under the sink or behind access panels.
Once you’ve turned off the appropriate valve, turn on the faucet and shower to relieve any remaining pressure in the pipes. You’ll know you’re ready when only air comes out instead of water! Now you can proceed with confidence knowing you’re working in a safe environment.
B. Gather tools and materials
Before diving into the task of removing bathtub fixtures, you’ll need to gather a few essential tools and materials.
Start with an adjustable wrench. This versatile tool will help you tackle various nuts and bolts. You’ll also want a screwdriver set, including both Phillips and flathead options for different screws.
Don’t forget pliers. They’re handy for gripping stubborn parts that refuse to budge. A utility knife can also be beneficial, especially if there’s caulking around the fixtures that needs removal.
Prepare some rags or towels too; they come in handy for catching any drips or spills during the process. Having a bucket nearby is wise for collecting any water that may escape when you detach your tub spout or other fixtures.
With these items on hand, you’ll be ready to proceed safely and efficiently!
C. Remove the showerhead and faucet handles
To start removing the showerhead, grab your adjustable wrench. A firm grip is essential to prevent slipping. Turn the showerhead counterclockwise until it loosens from its base. If you encounter resistance, a cloth can protect the finish while adding grip.
Next, focus on the faucet handles. Look for screws that may be hidden beneath decorative caps or handles themselves. Once located, use a screwdriver to gently remove them. Be cautious not to strip any screws in the process.
After unscrewing, pull off the handles with even pressure. Sometimes they can stick due to mineral buildup or corrosion—don’t force it if that happens! Instead, try wiggling them slightly or applying a bit of penetrating oil around their bases for easier removal later on.
Keep all parts together in a safe place so you won’t misplace anything when it’s time for installation again.
D. Loosen and remove the escutcheon plates
To tackle the escutcheon plates, start by identifying their location around your bathtub fixtures. These decorative covers help conceal plumbing and provide a finished look.
Using a flathead screwdriver or a utility knife, gently pry at the edge to loosen any caulking or adhesive. Take care not to damage the surrounding surfaces; patience pays off here.
Once loosened, check for screws that might be holding the plate in place. If you find any, remove them with an appropriate screwdriver. This step ensures you’re not working against anything stubbornly clinging on.
After all fasteners have been addressed, simply pull away from the wall or tub surface. You’ll reveal hidden connections behind it—making way for fresh updates or repairs related to your bathtub fixtures.
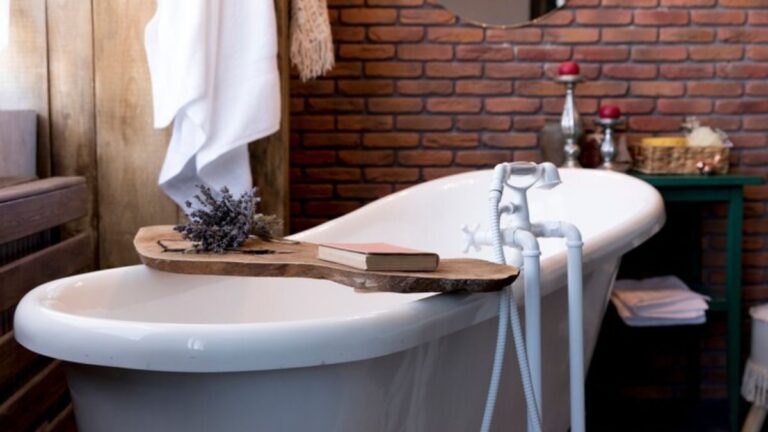
E. Detach the bathtub spout
To detach the bathtub spout, start by identifying how it’s secured. Some spouts simply slide on and off, while others may have a set screw hidden underneath. If there’s a screw, use an Allen wrench or screwdriver to loosen it.
Once you’ve located the attachment mechanism, grip the spout firmly. If it’s stuck, gently wiggle it back and forth to break any buildup of debris or mineral deposits around the base.
If your tub has a threaded connection at the end of the spout, twist counterclockwise to unscrew it completely. Be cautious not to apply too much pressure; you don’t want to damage surrounding fixtures.
After removal, inspect for any old plumber’s tape or sealant that might need cleaning up before installing new fixtures. This step ensures everything fits snugly when it’s time for reinstallation later on.
F. Clean and prepare for new fixtures
Once you’ve successfully removed the old bathtub fixtures, it’s time to clean up. Start by inspecting the area around the plumbing. Old caulk, grime, and mineral deposits can accumulate over time.
Use a putty knife or scraper to gently remove any leftover caulk from the tub surface. Be careful not to scratch your bathtub! A little warm soapy water goes a long way in loosening stubborn residues.
After clearing away debris, give everything a good rinse with clean water. This will prepare your space for new fixtures without contamination from leftover materials.
Next, dry off all surfaces thoroughly using a microfiber cloth or towel. A dry surface is crucial for proper sealing once you install your new fixtures.
Take a moment to check for any signs of wear on pipes or fittings before proceeding. This ensures that you’re starting fresh with no hidden issues waiting below the surface.
Tips for a smooth removal process
To ensure a smooth removal process for your bathtub fixtures, take your time. Rushing can lead to mistakes and damage.
Label all parts as you remove them. This makes reinstallation much easier later on. A small container or ziplock bag for screws and small pieces will keep everything organized.
Use gentle pressure when loosening fixtures. If something feels stuck, don’t force it; apply some penetrating oil and let it sit for a while.
Consider taking photos during each step of the removal process. Visual references can be incredibly helpful if you encounter any confusion during reinstallation.
Stay patient throughout the project. Each fixture might have its quirks that require attention and thoughtfulness to detach successfully without harm.
Troubleshooting common issues
Removing bathtub fixtures can sometimes lead to unexpected challenges. Here are some common issues you might encounter and how to tackle them effectively.
If you’re struggling with stuck screws or nuts, try applying penetrating oil. Let it sit for a few minutes before attempting to loosen them again. A little patience goes a long way in this scenario.
When dealing with corrosion, use a wire brush or sandpaper on the affected areas after applying the penetrating oil. This should help remove any rust buildup that’s making removal difficult.
If water starts leaking during your process, ensure you’ve turned off the main supply completely. Use towels or rags to soak up any excess water until you have everything secured.
For those stubborn showerheads that refuse to budge, consider using heat from a hairdryer or hot towel application. The expansion can sometimes make disassembly easier.
If you’re unsure about any step along the way, don’t hesitate to consult online videos or guides specific to your fixture type. There’s plenty of support available at your fingertips!
With these tips and troubleshooting strategies in mind, you’re better equipped to handle removing bathtub fixtures efficiently and confidently.