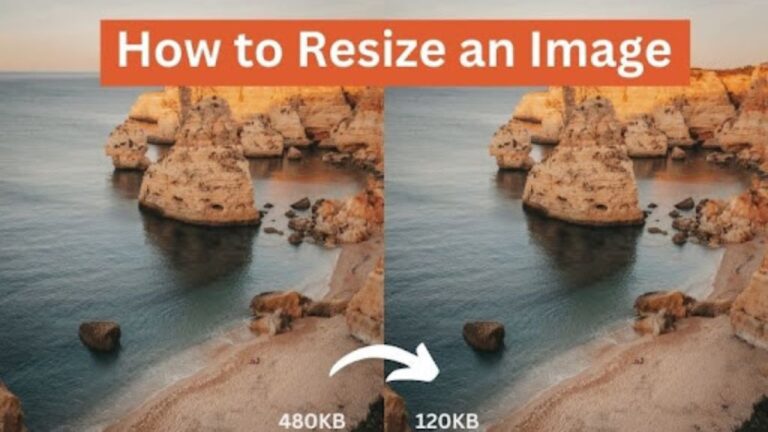
Resize an image is a common task for photographers, designers, and everyday users. Whether you need to fit a picture into specific dimensions for social media, optimize it for a website, or prepare it for print, resizing helps you adjust the size without compromising the image’s visual impact. With multiple tools and techniques available, resizing has become more accessible than ever, allowing users to make quick adjustments on various platforms.
What Does Image Resizing Mean?
Image resizing refers to the process of altering an image’s dimensions—either making it larger or smaller—while maintaining its aspect ratio or adjusting it as needed. This process helps modify the image size to fit specific requirements, such as pixels or file size, without significantly distorting the content. While resizing, it’s important to preserve the quality and sharpness of the image, especially when enlarging, as enlarging too much can cause pixelation and loss of detail.
How to Resize an Image
There are various tools available for resizing images, each offering different features and methods. Here’s a step-by-step guide for resizing images using some popular tools:
Method 1: Resize an Image with GIMP
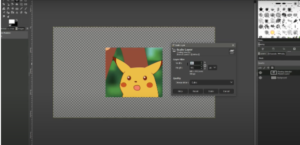
GIMP is a powerful, free, and open-source image editor that offers a wide range of features, including precise image resizing. While it’s more advanced than some basic tools, GIMP is excellent for users who need control over image quality and scaling, especially for larger projects or high-resolution images.
Follow these steps to Resize an image with GIMP:
- Open your image in GIMP.
- Go to the “Image” menu and select “Scale Image.”
- Enter the desired dimensions (width and height).
- Click “Scale” to resize the image.
- Save your resized image by selecting “File” > “Export As.”
Method 2: Resize an Image with Photoshop
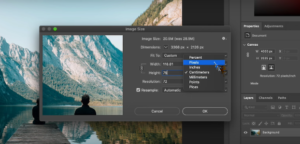
Adobe Photoshop is one of the most widely used professional image editing tools. It offers precise control over every aspect of image manipulation, including resizing. With Photoshop, you can resize images for various purposes while maintaining image quality, even when adjusting the dimensions dramatically.
Follow these steps to Resize an image with Photoshop:
- Open the image in Photoshop.
- Go to the “Image” menu and select “Image Size.”
- Input your desired dimensions while maintaining the aspect ratio if needed.
- Click “OK” to apply the changes.
- Save the resized image by going to “File” > “Save As.”
Method 3: Resize an Image with Canva
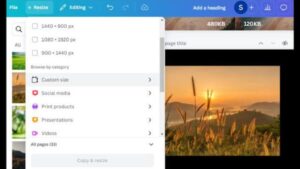
Canva is a user-friendly, online tool that simplifies graphic design tasks, including resizing images. With its drag-and-drop interface, resizing images becomes quick and easy, especially for those without advanced design skills. Canva offers a range of preset dimensions, making it perfect for creating social media graphics, presentations, and other digital content.
Follow these steps to Resize an image with Canva:
- Open Canva and upload your image.
- Select the “Resize” option from the toolbar.
- Input the dimensions you want or choose from preset options.
- Download the resized image.
Method 4: Resize an Image on a Mac
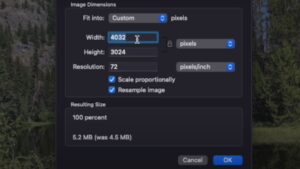
Mac’s Preview app offers a built-in and efficient way to resize images without needing third-party software. Whether you’re a casual user or a professional, Preview allows you to resize images quickly while maintaining good quality. With options to adjust dimensions, resolution, and format, it’s an ideal tool for resizing single images or even batch resizing multiple images at once.
Follow these steps to resize an image with the Preview app:
- Locate the image you want to resize on your Mac. Right-click the image and choose Open With > Preview.
- Select Tools > Adjust Size. This will bring up the “Image Dimensions” window, where you can input new dimensions for your image.
- Input the desired width and height for your image.
- Once you’ve entered the new dimensions and adjusted the resolution, the Preview app will automatically display the changes in real time.
How to Batch Resize Images Online?
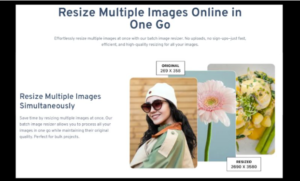
Imglarger’s Image Batch Resizer is a powerful online tool that allows you to resize multiple images simultaneously, saving time and effort. Whether you’re managing a large collection of photos for your website, social media, or personal projects, this tool makes it easy to adjust the size of many images at once without compromising quality.
With just a few clicks, you can upload several images, choose your desired dimensions, and download them in bulk. The batch resizer is perfect for photographers, designers, and marketers who need efficient, high-quality resizing options.
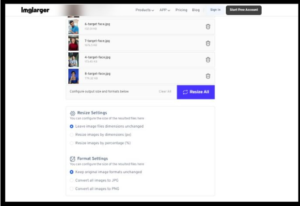
Follow these steps to resize images with imglarger
- Go to imglarger’s homepage find the “resize image batch” function and go to the image resizing tool page.
- Drag or drop a single or multiple images to the tool for resizing. You can upload jpg, png, jpeg, jfif, bmp, avif, webp images.
- Go to Resize Settings > Resize Images by Dimensions (px). In the width or height box, input the desired value.
- Once the settings are all done, click “Resize All” and imglarger will do the rest work automatically. You will get the resized images in seconds.
When Do We Need to Resize an Image?
There are many situations where resizing an image becomes necessary. Here are some common examples:
- Social Media: Platforms like Instagram, Facebook, or Twitter require specific image dimensions for posts, covers, or ads.
- Website Optimization: Large images can slow down web pages, so resizing helps reduce file size without losing clarity, improving loading times and performance.
- Print Media: Whether it’s for flyers, posters, or business cards, resizing ensures that images fit the exact dimensions required for high-quality prints.
- Device Compatibility: To ensure images display properly on different devices, such as smartphones, tablets, or desktops, resizing might be required.
Conclusion:
Resizing images is a useful skill for many situations, like adjusting pictures for websites, social media, or personal projects. Whether you prefer using software like GIMP and Photoshop or easier options like Preview on a Mac or iPhone, there’s a method for everyone. Online tools like Imglarger’s Batch Resizer make resizing multiple images quick and simple, saving you time and hassle.
Each method has its benefits. Software like GIMP or Photoshop offers more control, but online tools like imglarger are fast and don’t require any downloads. Knowing the difference between resizing and cropping can also help you choose the right approach for your images.Whatever method you pick, resizing helps your images look their best and fit where they’re needed, making your visuals more effective and appealing.